- Appointment Payments Just Got Easier
- Quick Summary – Appointment Payments Essentials
- Inside the New Appointment Payments Tab
- Before vs. After: Payment Tracking in GHL
- Why Centralized Appointment Payments Matter
- How to Use the Appointment Payments Tab
- Pro Tips to Maximize Appointment Payments
- Common Questions About Appointment Payments
- Streamline Your Payment Flow Without Leaving the Calendar
Appointment Payments Just Got Easier
If you’ve ever scrambled to find out if a client paid for their appointment payments or worse, had to chase down balances after the session, you’ll love this.
GoHighLevel just dropped a feature that simplifies all that mess: the new Payments Tab inside the Appointment Modal.
Now you can see exactly what’s been paid, what’s still owed, and what discounts were used without clicking around five different tabs.
No more guessing. No more digging through transactions or wondering which coupon was applied. It’s all right there, inside the same window you use to manage the appointment.
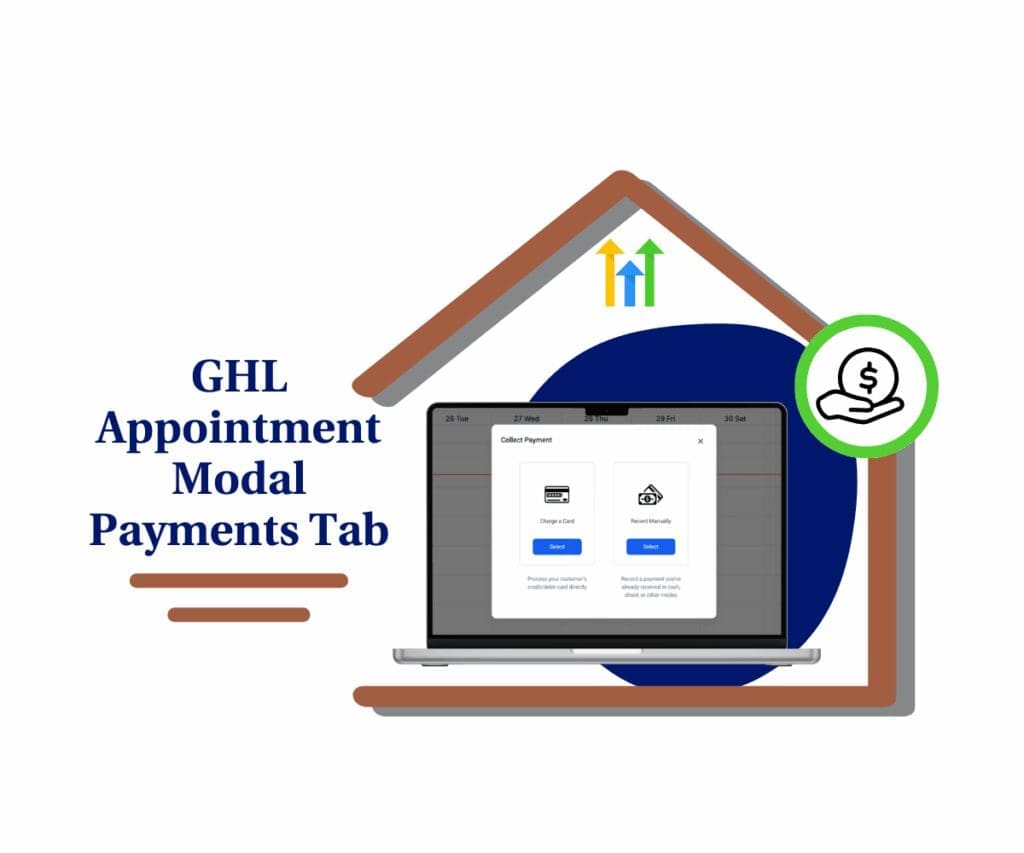
The new Payments Tab lets you handle everything—from checking balances to collecting payments—without ever leaving the appointment window. It’s faster, cleaner, and way more efficient.
Quick Summary – Appointment Payments Essentials
Purpose: This update introduces a new Payments Tab inside the GoHighLevel Appointment Modal to streamline billing and collection.
Why It Matters: It eliminates the need to switch between tabs or tools just to check balances or apply discounts.
What You Get: Real-time visibility into payment status, attendee-level summaries, applied coupons, and one-click payment collection.
Time to Complete: 5–10 minutes to activate and start using.
Difficulty Level: Easy – no coding or setup complexity, just enable in Labs and go.
Key Outcome: Faster, more accurate appointment payments without leaving the scheduling screen.
Inside the New Appointment Payments Tab
GoHighLevel added a new “Payments” tab inside the Appointment Modal—and it’s a game changer for anyone who runs a service-based business.
Here’s what you get at a glance:
Automate marketing, manage leads, and grow faster with GoHighLevel.
- Total Payment Overview
Instantly see how much was paid, what’s still due, and the total appointment cost. No jumping into Stripe, no extra clicks. - Attendee-Level Breakdown
Running group sessions or classes? Now you can see payment summaries for each attendee in one spot. - Full Transaction History
Every payment tied to the appointment is listed—dates, methods, and amounts. This helps your team troubleshoot billing issues in seconds. - Coupon Codes + Discounts
See what promo codes were used and exactly how much was discounted. No more manual tracking or double-checking invoice notes. - One-Click Payment Collection
If a balance is due, just hit “Collect Payment.” You can charge a saved card or log a manual payment right there—without leaving the modal.
This isn’t just about convenience. It’s about turning the appointment view into a true business dashboard for client transactions.
Before vs. After: Payment Tracking in GHL
Before this update, managing appointment payments in GoHighLevel felt like piecing together a puzzle.
You’d schedule an appointment in the calendar then bounce over to the payments tab, invoices, or transactions page to figure out what was paid and what wasn’t. Tracking discounts? That meant checking coupons separately and hoping you didn’t miss anything.
It worked… kind of. But it was clunky. And if you had multiple team members trying to stay on top of payment status, things got messy fast.
Now?
The new appointment payments tab flips the script.
Everything you need is right inside the modal. One click, one tab, full clarity.
You don’t have to:
- Cross-reference different pages for invoices or charges
- Manually match coupon codes to appointment bookings
- Wonder if the balance showing is accurate
It’s all centralized. It’s all live. And it updates in real time as payments are recorded or charged.This update isn’t just a quality-of-life tweak—it fundamentally improves how teams handle billing at the calendar level.
Why Centralized Appointment Payments Matter
If you’re running a busy agency, medspa, or coaching business, every appointment booked is money on the calendar. But only if that money actually gets collected.
This new appointment payments tab helps you do exactly that—with less friction, fewer mistakes, and way more clarity.
Here’s why it matters:
- Faster Payment Collection
Your team can see the balance and collect on it in the same place they manage bookings. That cuts down on follow-up delays and missed payments. - Fewer Support Issues
You won’t need to double-check invoices or guess if someone used a coupon—it’s all right there in front of you. - Cleaner Handoffs Between Team Members
Whether it’s sales, admin, or billing staff—everyone now works from the same view. That reduces confusion and duplicate outreach. - Better Client Communication
When clients ask about balances or past payments, your team has fast, accurate answers. That builds trust and keeps your brand looking buttoned-up. - Saves Time Across the Board
Less tab-hopping = fewer mistakes and more time focused on growth.
Still juggling spreadsheets, payment links, and calendar tools? This built-in upgrade could save you a few hours—and a few headaches—every week.
How to Use the Appointment Payments Tab
No more chasing down payments after the fact or flipping between screens to see if someone still owes you. The new tab puts all the info you need—right inside the appointment.
Here’s how to get started:
Step 01 – Activate the Feature in Labs
1.1 From your Agency view, go to the left menu.
1.2 Click on Settings > Labs.
1.3 Enable the following options:
– Payments Tab in Appointments
– Coupon Codes

Step 02 – Open the Appointment Modal
2.1 Navigate to Calendar > Appointments.
2.2 Click on any appointment to open the modal window.

Step 03 – Access the New Payments Tab
3.1 Inside the modal, locate and click the Payments tab.
3.2 You’ll now see payment details directly tied to this booking.

Step 04 – Review Appointment Payment Details
4.1 View the total amount, amount paid, and remaining balance.
4.2 Check any discounts or coupon codes used.
4.3 Review full transaction history for the appointment.
4.4 If it’s a group booking, view attendee-level summaries.

Step 05 – Collect Remaining Payments
5.1 If there’s a balance due, click Collect Payment.
5.2 Choose to:
– Charge Card (if a card is on file)
– Record Manual Payment (for cash, bank transfer, etc.)

And that’s it. No extra tools or third-party apps required—just a smarter way to manage money tied to your calendar.
Pro Tips to Maximize Appointment Payments
Now that the feature’s live in your account, here’s how to go from “just using it” to actually making it work harder for you and your team:
Use Coupon Tracking to Optimize Your Offers
You can now see exactly which coupon codes were used and how much was discounted per appointment. Use this data to evaluate what offers drive the most bookings—or which ones might be cutting too deep into your margins.
Train Your Team to Check Before Marking Appointments Complete
Remind your team to always peek at the Payments tab before wrapping up an appointment—it’s the easiest way to catch any unpaid sessions.
Use Payment Status to Trigger Workflows
You can tag appointments as “Paid in Full” or “Balance Due” and fire automation based on that. Great for sending reminders, follow-ups, or even blocking content access until payment is complete.
Leverage Manual Payment Logging for Offline Options
Not every client pays by card. If you get paid in cash, Venmo, or bank transfer—use the “Record Manual Payment” option to keep your records clean and your balances accurate.
Cross-Check the Auto-Created Product
If something looks off, head over to Payments > Products and look for items tagged with “Calendar.” This is how GHL links payments to appointments, so it’s smart to know where to verify.
Common Questions About Appointment Payments
Still got questions? Let’s clear up a few common ones agencies might have about this new feature.
Streamline Your Payment Flow Without Leaving the Calendar
This update might seem small on the surface—but if you run a high-volume service business or agency, it’s a serious workflow upgrade.
The new appointment payments tab gives your team full visibility into payment status without needing to open a second screen or check another system. That means fewer mistakes, faster collections, and better client communication.
Here’s how to roll it out like a pro:
- Turn it on in Labs for your main sub-accounts and test it yourself first.
- Train your team to check the Payments tab before closing out any appointment.
- Create a SOP or quick Loom video showing how to collect balances on the spot.
- Use workflows or tags to trigger payment follow-ups automatically.
Clients appreciate clarity. Your staff saves time. And your revenue collection gets cleaner with every appointment.
This is what smart billing inside a CRM should look like.
Scale Your Business Today.
Streamline your workflow with GoHighLevel’s powerful tools.
