GoHighLevel Countdown Timer is a great way to create urgency and encourage visitors to take action fast. Whether you’re promoting a limited-time sale, event registration, or special offer, adding a countdown timer to your funnels and websites can help increase conversions and engagement.
In this guide, you’ll learn how to add, customize, and optimize a GoHighLevel Countdown Timer. By the end, you’ll be able to use countdown timers effectively to drive more sign-ups, sales, and customer interactions.
How to Add a GoHighLevel Countdown Timer to a Funnel
Step 1: Open Your Funnel

- Log in to your GoHighLevel account.
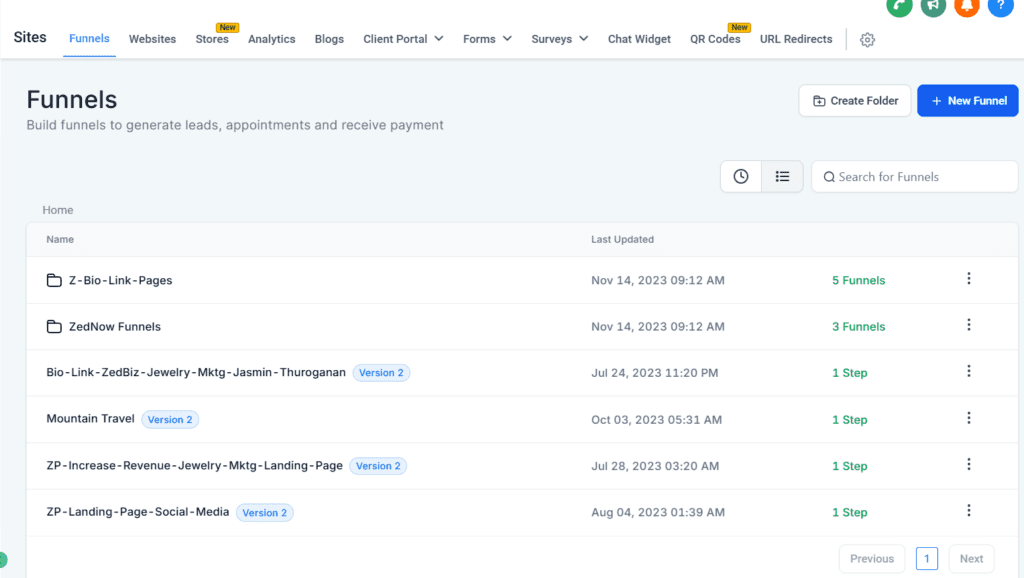
- Click on Sites, then select Funnels.
- Choose an existing funnel or create a new one where you want to add a countdown timer.
Step 2: Open the Funnel Editor
Automate marketing, manage leads, and grow faster with GoHighLevel.

- Hover over your selected funnel.
- Click Edit to open the Funnel Builder.
Step 3: Add the GoHighLevel Countdown Timer

- Open the Elements panel on the right.
- Find the Countdown Timer element.
- Drag and drop the timer into your funnel page.

Step 4: Customize Your Timer
- Click on the GoHighLevel Countdown Timer to open its settings. Adjust the following:
- End Date & Time – Set the deadline for your offer or event.
- Timezone & Language – Choose settings that match your audience.
- Design – Customize the color, font, and size to fit your page style.
- Expiration Action – Decide what happens when time runs out (e.g., redirect to another page or display a message).

Step 5: Save and Publish

- Click Save, then Publish your funnel to make the GoHighLevel Countdown Timer live.
How to Add a GoHighLevel Countdown Timer to a Website
Step 1: Open Your Website

- Go to the Sites section in GoHighLevel.
- Click on Websites and select the site where you want to add a countdown timer.
Step 2: Open the Website Editor

- Hover over your chosen website.
- Click Edit to open the Website Builder.
Step 3: Add the Countdown Timer

- Open the Elements panel and find the Countdown Timer.
- Drag and drop it onto your website page.
- The setup and customization steps are the same as for funnels.
Step 4: Customize Your Timer
- Click on the GoHighLevel Countdown Timer and set the following:
- End Date & Time – Choose when the countdown should expire.
- Timezone & Language – Adjust as needed for your audience.
- Design – Match the timer’s colors and fonts to your website branding.
- Expiration Action – Set what happens when the countdown reaches zero.
Step 5: Save and Publish
- Click Save, then Publish to make your countdown timer live.
Best Practices for Using GoHighLevel Countdown Timers
- Make it visible – Place the countdown timer where users can see it easily, like near a call-to-action button.
- Use a strong message – Combine it with phrases like “Limited Time Offer” or “Sale Ends Soon” to increase urgency.
- Be honest – Use countdown timers for real deadlines, not just as a trick.
- Test different styles – Experiment with different designs and placements to see what works best.
Conclusion
A GoHighLevel Countdown Timer is an easy but powerful tool to boost sales, sign-ups, and engagement. Whether you add it to a funnel or website, it can help create urgency and encourage immediate action. Try adding a countdown timer to your GoHighLevel dashboard today and see how it improves your conversions!
Scale Your Business Today.
Streamline your workflow with GoHighLevel’s powerful tools.