The New Reporting Flow That’ll Save You Time & Sanity
Automated scheduled reporting just got easier to manage—finally. If you’ve ever had to sort through a messy list of sub-account reports, you know how fast things can get out of hand. One new account, and suddenly your inbox is full of reports you didn’t plan to send.
GoHighLevel cleaned things up with a better layout, smarter controls, and bulk options that work. Now, you can select multiple reports at once, pause or resume in seconds, and use filters to get a clear view of what’s live and what’s not.
They also added a settings panel with agency-level controls. You can hit pause on every scheduled report with one click or stop reports from being created automatically when you add a new account. That’s a big win for agencies juggling growth and client onboarding.
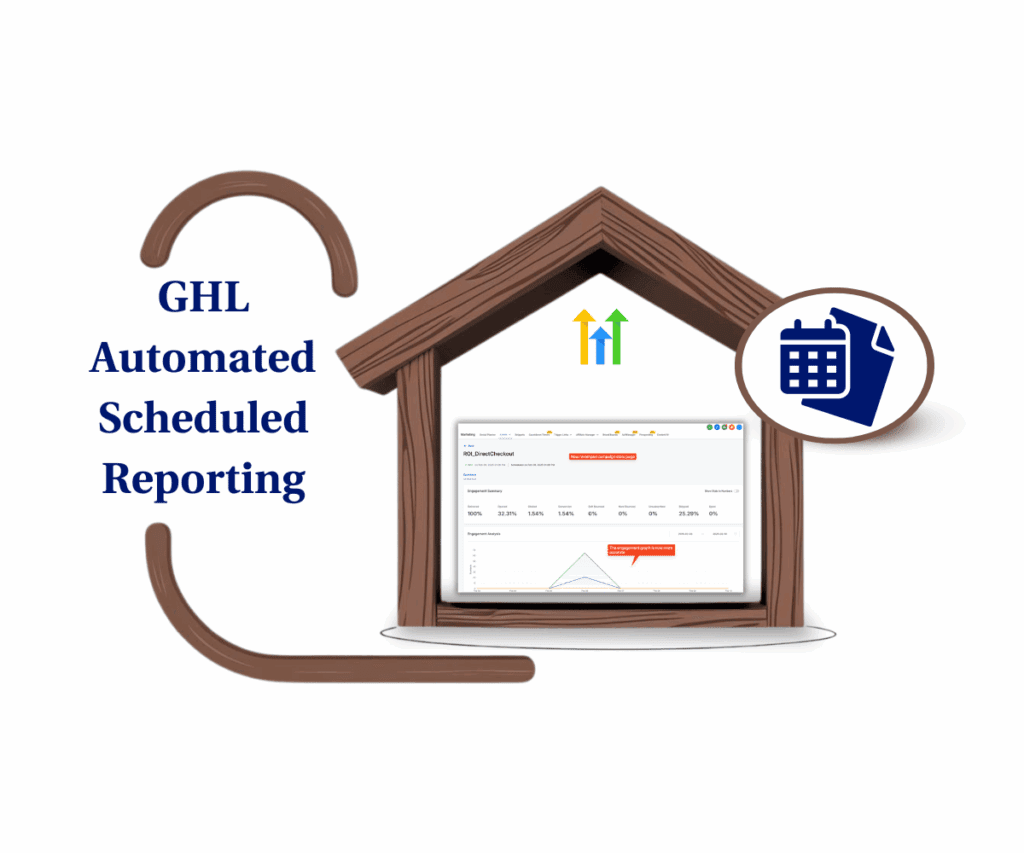
In short, this isn’t just a new look—it’s a smarter way to run your reporting. No fluff. Just a better system that helps you keep things clean and under control.
Smarter Controls. Cleaner Layout. Better Reporting
Automated scheduled reporting is now simpler to manage and easier to understand. GoHighLevel updated the Agency View with features that help you move faster and stay organized.
The first thing you’ll notice is the cleaner table. Reports are laid out in a more readable format, so you can see status and details at a glance. No more scanning rows of clutter to figure out what’s running.
Bulk actions are now built in. With the new checkboxes, you can pause or resume several reports at once. This is especially helpful if you’re managing reports across many sub-accounts and need to make changes quickly.
Automate marketing, manage leads, and grow faster with GoHighLevel.

You can also filter reports by status. Want to see only paused or active ones? It takes one click. This small change makes a big impact when you’re trying to spot issues or double-check that the right reports are running.
There’s also a new settings panel. From there, you can pause all reports at once or set whether reports should be created automatically when a new account is added. This gives you more control and fewer tasks to manage during onboarding.
These updates don’t add complexity—they remove it. And that’s what makes automated scheduled reporting finally feel like a system built for agencies.
How to Use the New Scheduled Reporting Tools
Making changes to your automated scheduled reporting setup is now a lot simpler. You don’t need to dig through sub-account settings or open reports one by one. Everything’s right there in one spot—and the controls are built for speed.
This quick guide walks you through the updated reporting tools step by step. Whether you’re pausing everything during a transition, fine-tuning settings for new clients, or just trying to clean up your reports list, these tools give you more control with less effort.
Here’s your no-fluff walkthrough:
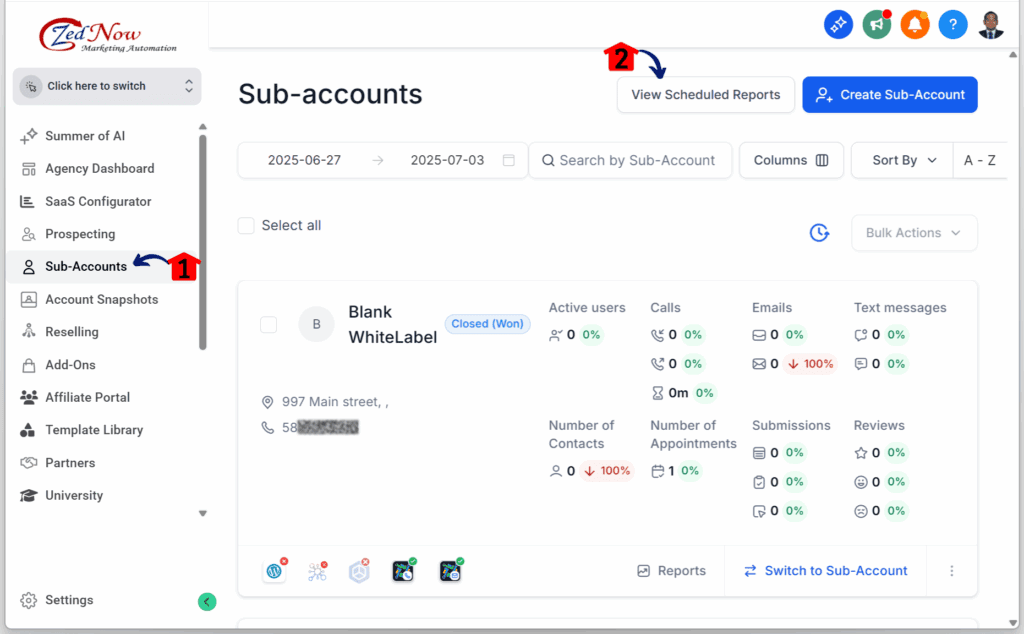
Step 1.0 – Access the Main Left Hand Menu in your GoHighLevel Agency Account
- The Main Menu on the Left side of your screen has all the main areas that you work in when using GHL
1.1 Click on the Sub-accounts Menu Item.
- Access the Sub-accounts section of GoHighLevel
- You’ll now be in the Sub-accounts section, where you can view the list of all your sub-accounts.
1.2 Click the View Scheduled Reports button.
- You’ll find this button beside the Create Sub-account button.
Step 2.0 – Manage Scheduled Reports in Bulk
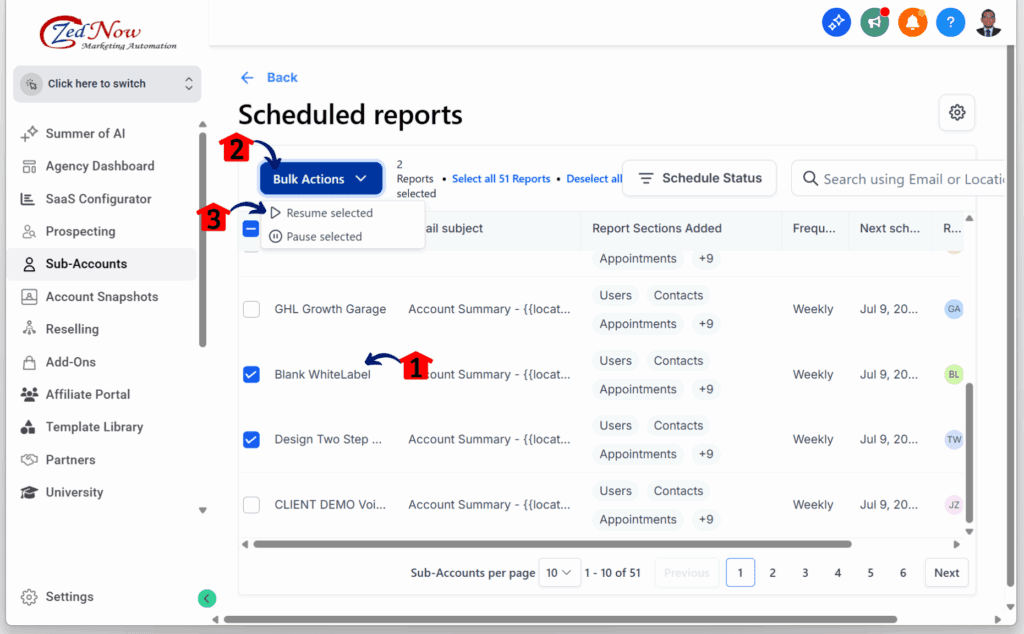
- Once you’ve clicked the “View Scheduled Reports” button, you’ll land on the Scheduled Reports dashboard.
2.1 Tick the boxes of at least two sub-accounts.
- A blue checkmark will appear for each selected sub-account.
Once you select two or more, the “Bulk Actions” button will show up.
2.2 Click the Bulk Actions button.
- You’ll see two new options: “Resume selected” and “Pause selected.”
2.3 Click the Resume selected option.
- This is just for demonstration purposes.
Step 3.0 – Update the Scheduled Report Settings
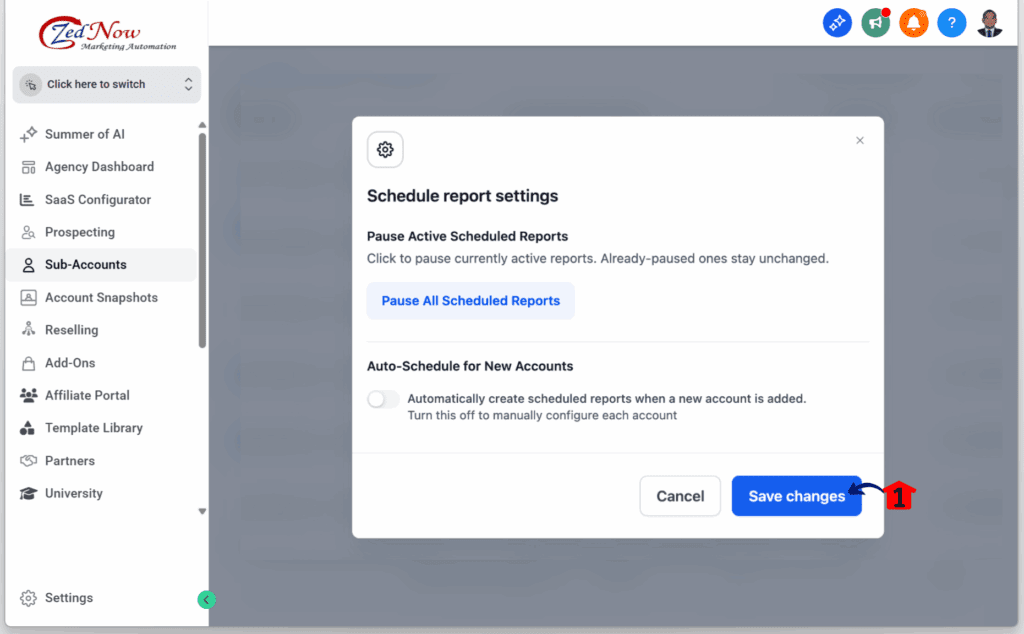
- A pop-up window for Scheduled Report settings should now appear.
3.1 Click the Save changes button.
Time to Clean Up Your Reporting
Automated scheduled reporting doesn’t need to be complicated. This update makes it easier to manage, especially if you’re working across a lot of sub-accounts. With bulk controls, status filters, and better settings, you’ve got more say over what gets sent—and when.
These changes aren’t flashy, but they solve real problems. You can pause everything fast. You can stop new accounts from sending reports by default. You can see what’s active without clicking around.
If reporting used to feel like extra work, now it doesn’t have to. Try it out, take five minutes to check your settings, and see how this fits into your workflow. It’s a small change that could save you time every week.
Scale Your Business Today.
Streamline your workflow with GoHighLevel’s powerful tools.
